- The Function of Self Test is available for self diagnosis by each part for several
list itsel
if operation shall not be executed after connection of Hanascan by User.
- If the list related each STEP to be caused trouble, shall be required A/S for
troubled cable or equipment.
[Caution]
- Make sure to read Explanation and Test to be started after taking
a Pro-active action.
1
Self TestSTEP1
- STEP 1 shall be checked Connection of USB Cable normally or
not between Computer and Hanascan.
- Test shall be executed after connection of USB cable and 12V adaptor.
- Test shall be executed Progress Bar over processing if START Button
to be pushed.
- If no trouble after completion of test, SUCCESS shall be indicated
and if trouble, FAIL shall be indicated.
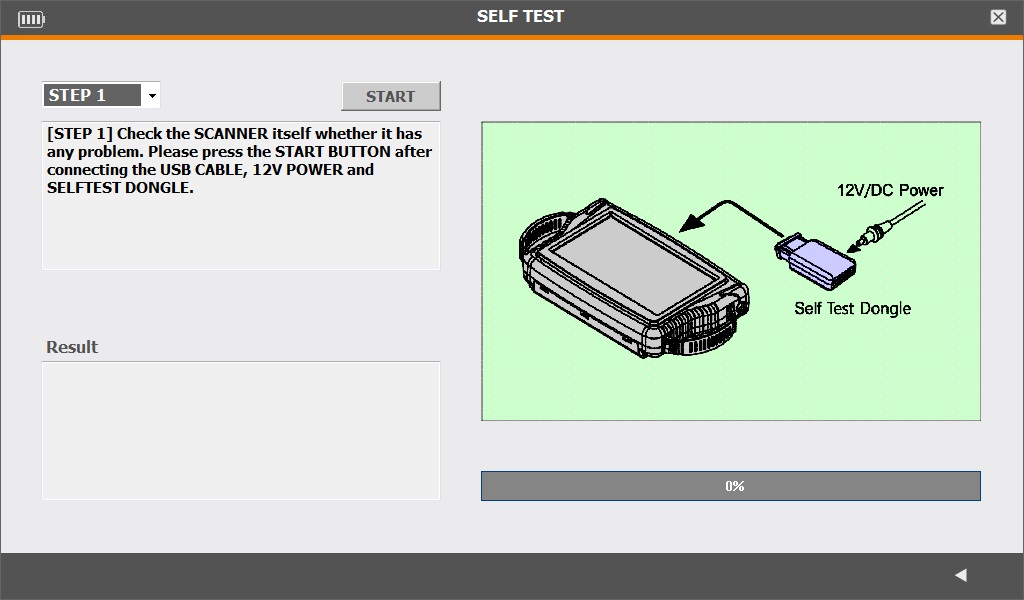
<Screen of STEP1>
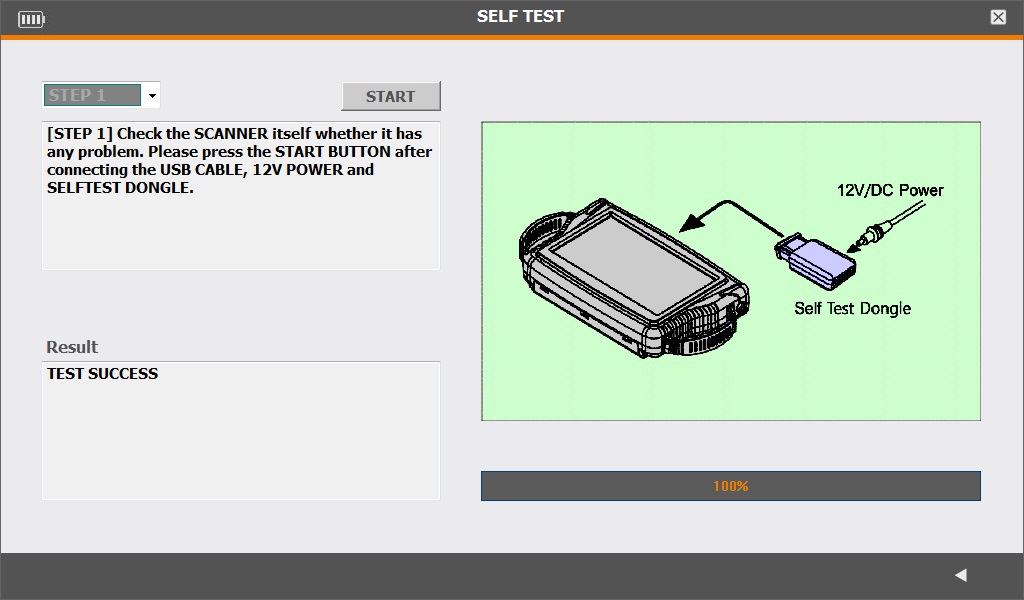
<Successful Screen of STEP1 Test>
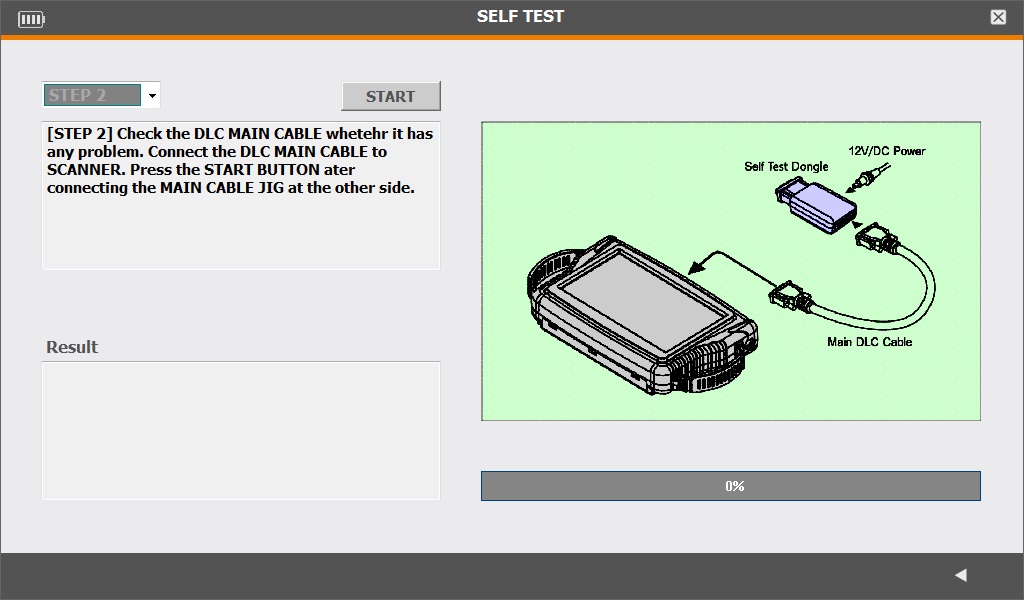
STEP2
- STEP2 shall be checked the operation of Hanascan normally.
- Test available only if USB Cable, DLC Cable, Dongle of Self test,
12V Adaptor shall be connected.
- If no trouble, SUCCESS shall be indicated and if trouble,
FAIL shall be indicated.
<Successful Screen of STEP2 Test>
2
Forced termination function for Makers- Diagnosis program can be terminated forcedly by pressing Recovery
button which is located beside Power button when there is
no responsef of diagnosis program.
3
BoreScope (Optional)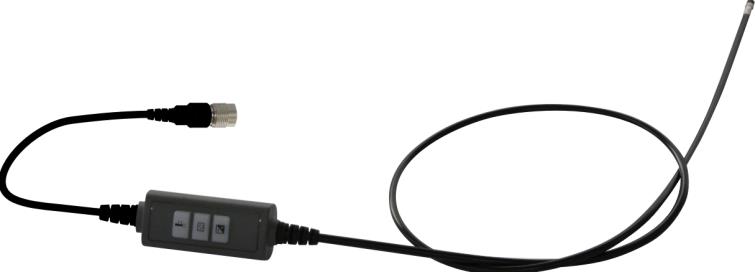
- If needed to use Borescope, the probe must be connected.
1) Click the Borescope icon (without connecting the probe)
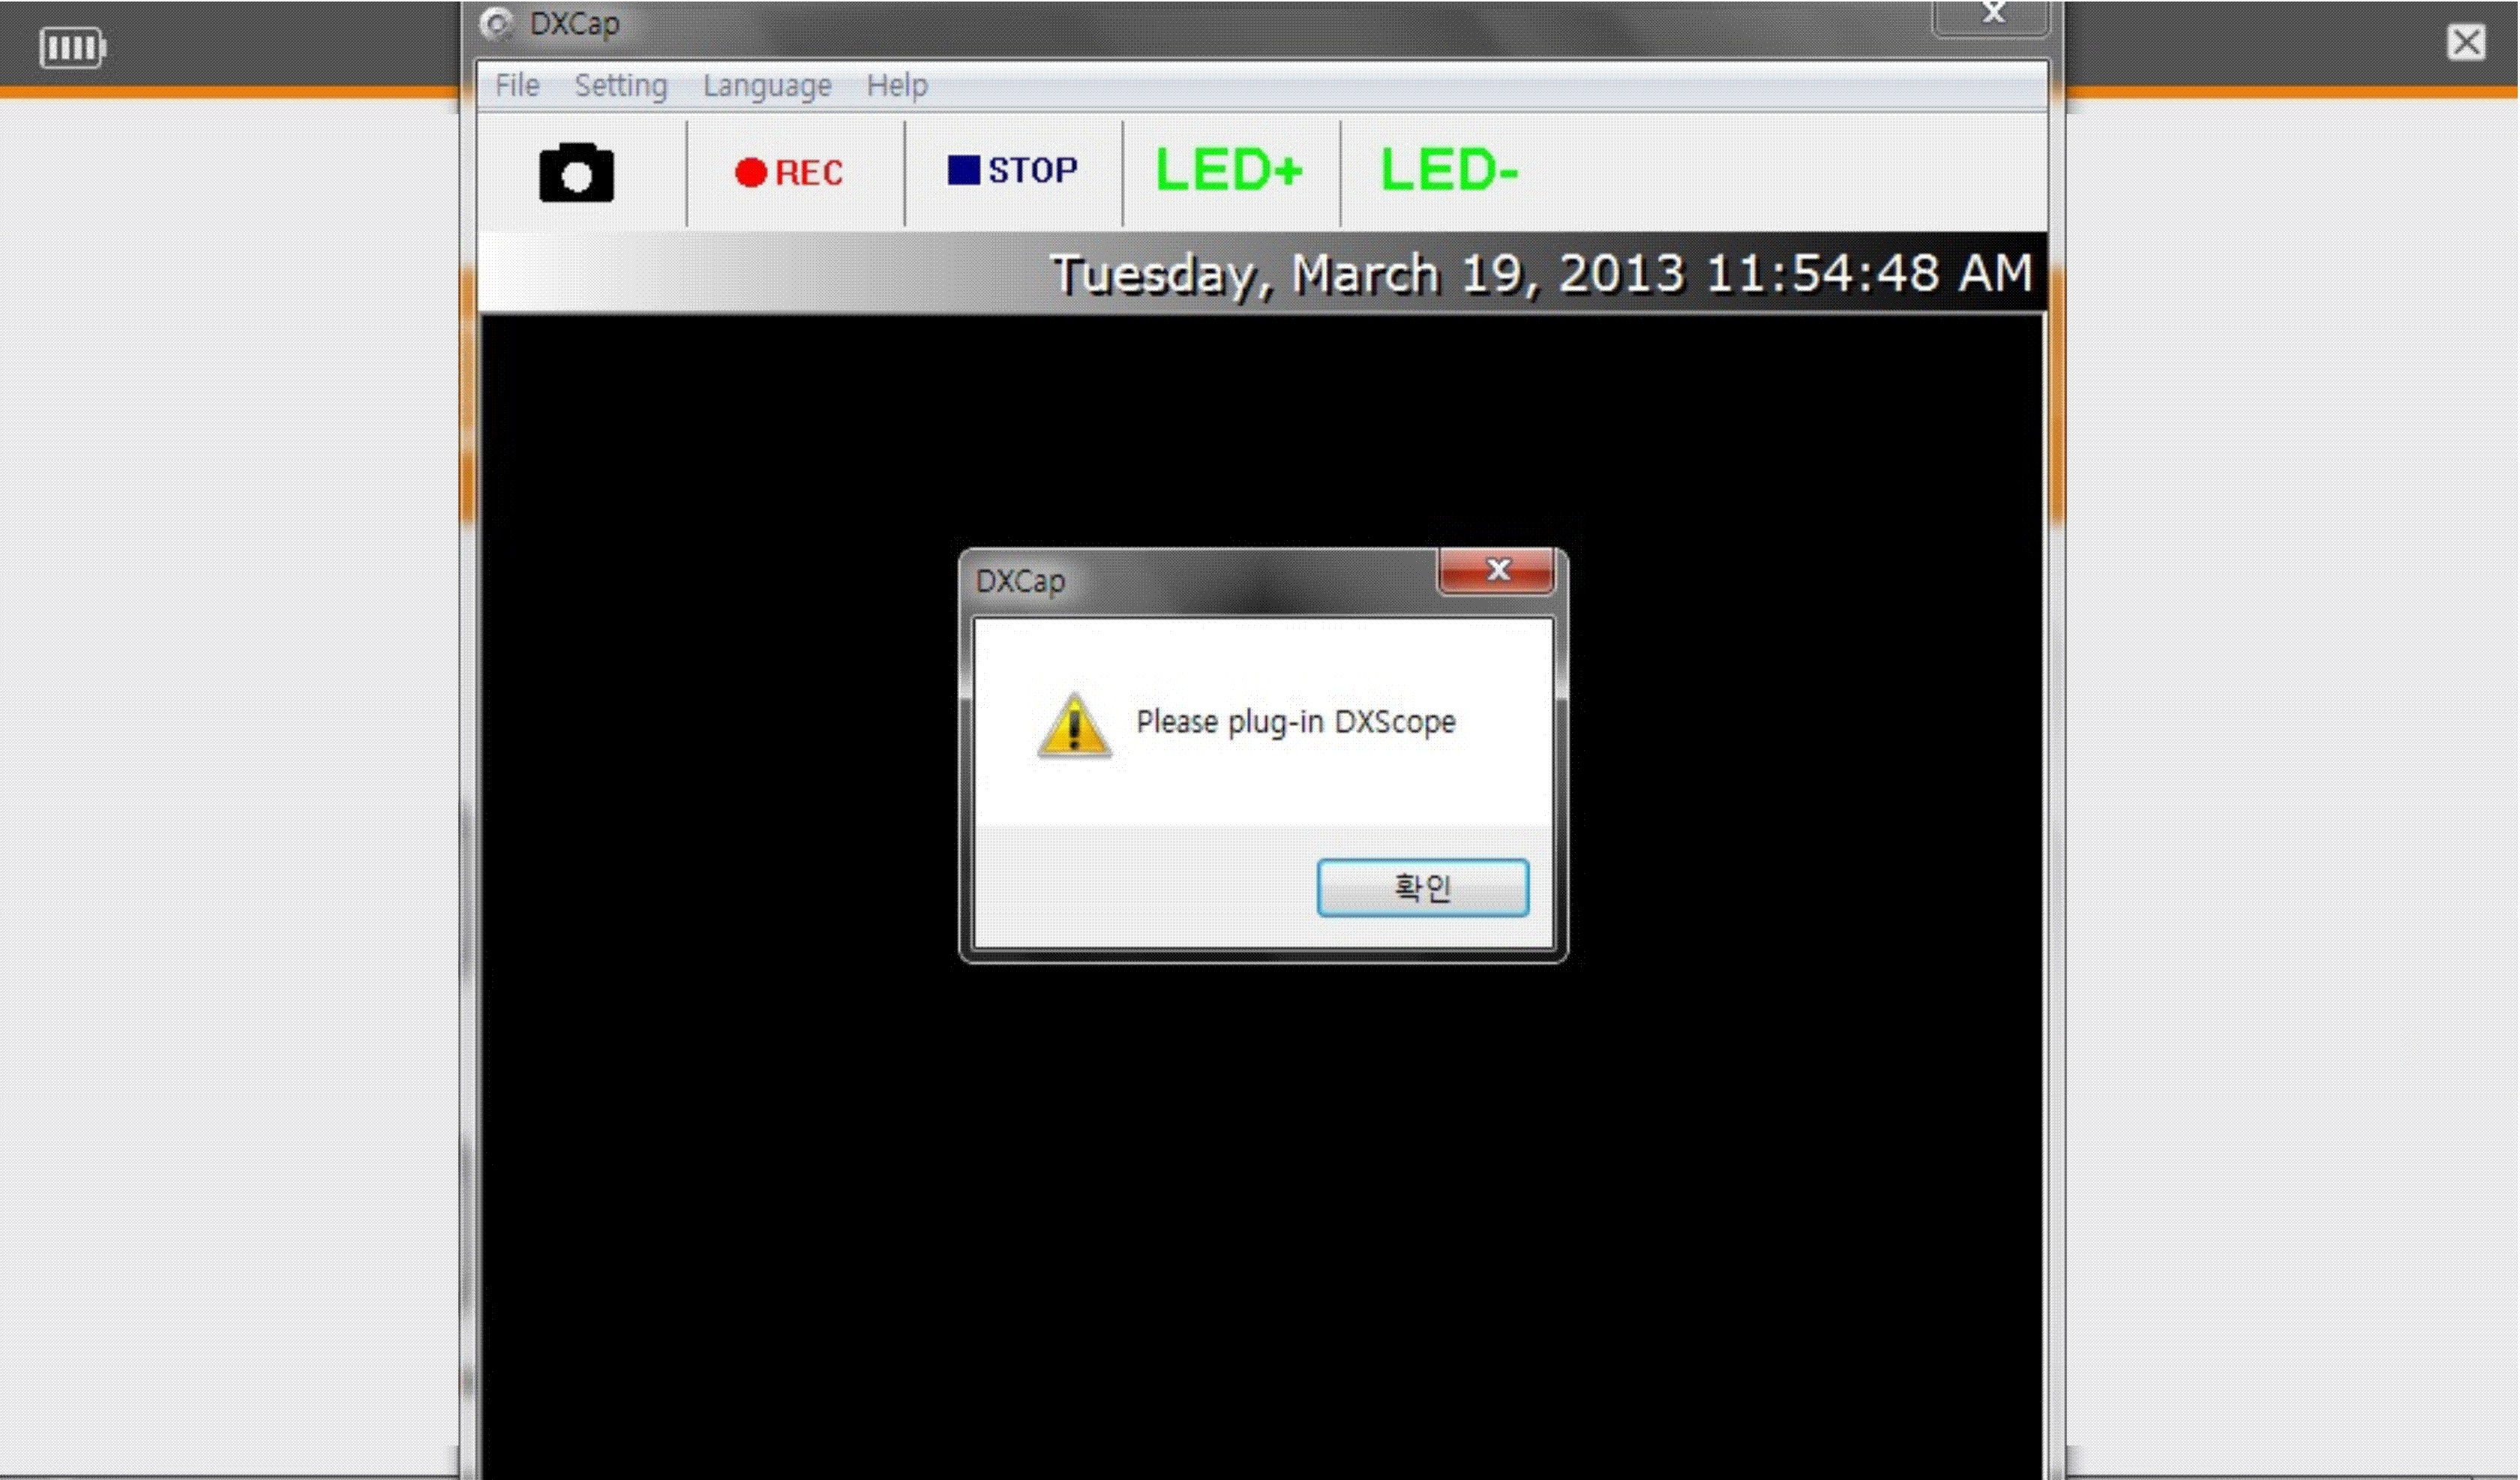

- When putting the probe into the location to be viewed, it will be shown
with high resolution of video clip.
- In case of too dark, adjust [LED+/ LED-] to bright the screen.
4
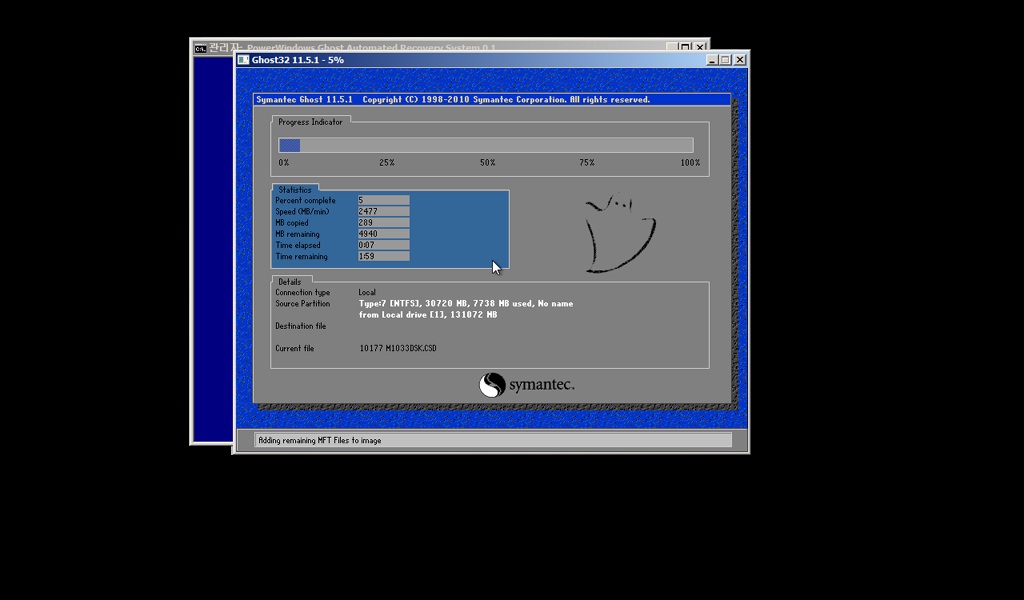
Restoration of System1) Provided only for Hanascan 10
2) Caution
- Format, Erase, Write Etc. to be executed,
Restoration is not able due to restoration System already to be
established at the RECOVERY(D:)
3) Restoration Method (by using Recovery Button)
- When below message [Press F12 to start Ghost Recovery …] appeared
in booting, If click the Recovery button, the device will be re-booted
automatically restored after entered into Restoration mode.
After the Restoration is done, the device re-booted automatically.

4) The Screen of System to be restored
- Restoration to be executed as below screen and re-booted
automaticallyf after completion.

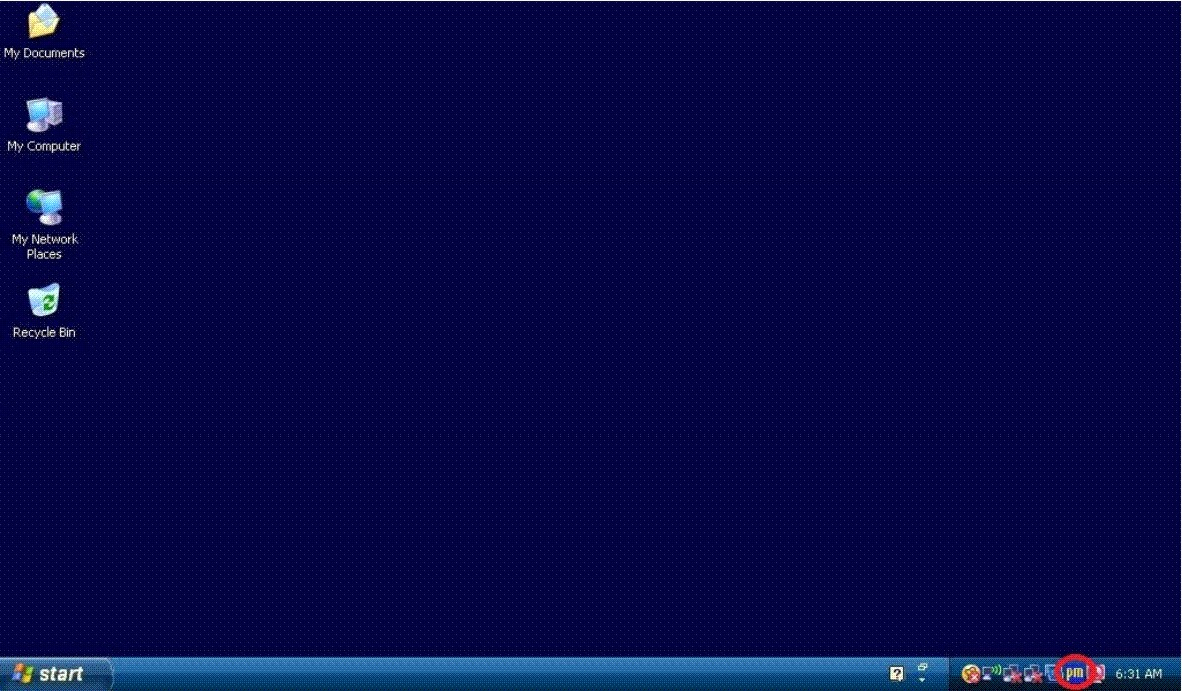
5) Automatic Execution of Touch Pad Establishing Program
after re-booting of System Restoration
- If System Restoration to be completed, the Program of Touch Pad
Establishing Program shall be executed after re-booting
- If Touch Pad Establishing to be completed, System shall
be started again.
5
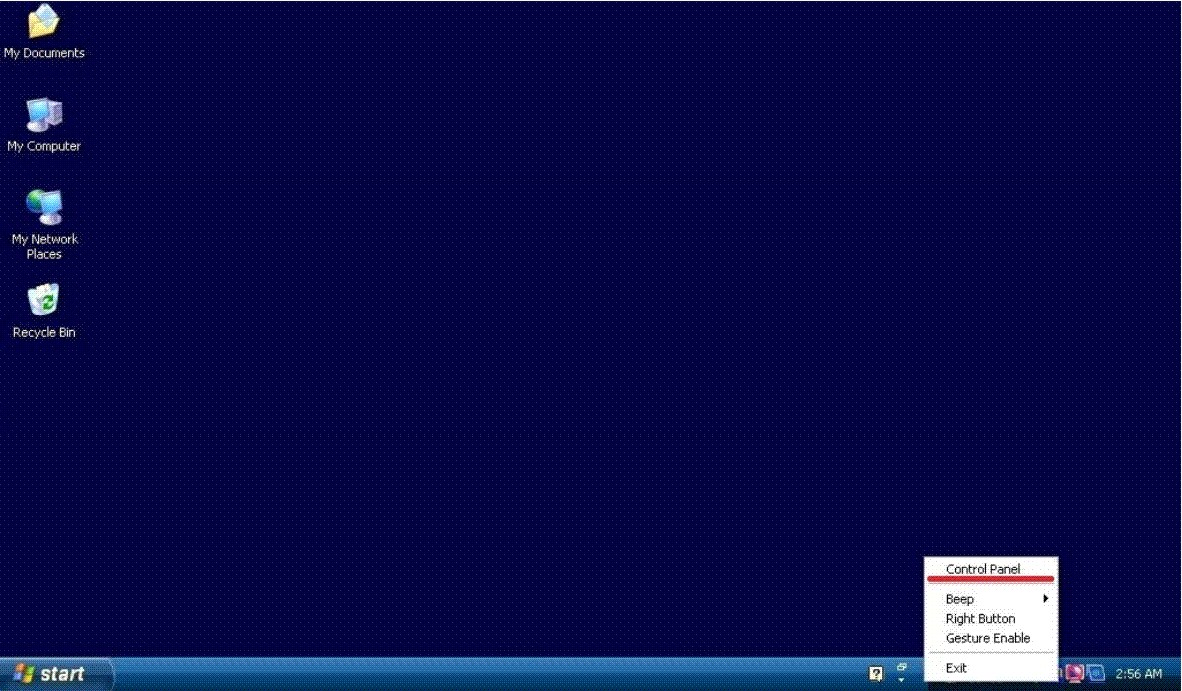
Establishing of Touch Pad1) If Touch Pointer not to be corrected, Pointer shall be re-established
according to below procedure.
- Execution of Touch Pad Establishing Program (Click the Red Icon with
circle at the right side of Bottom)
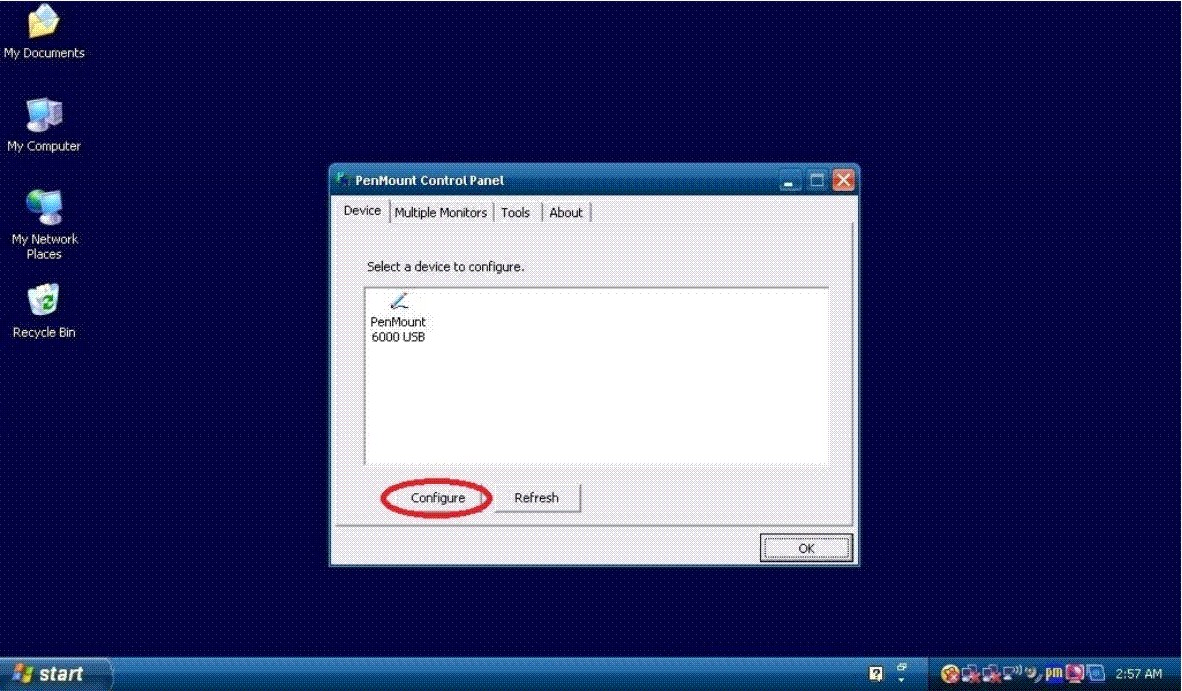
- Selection of Menu[Control Panel] at the Pop-Up Screen
- Selection [Configure]
- Selection[Advanced Calibration] (Tolerance to be caused at the Touch
Point if Standard Calibration to be established)
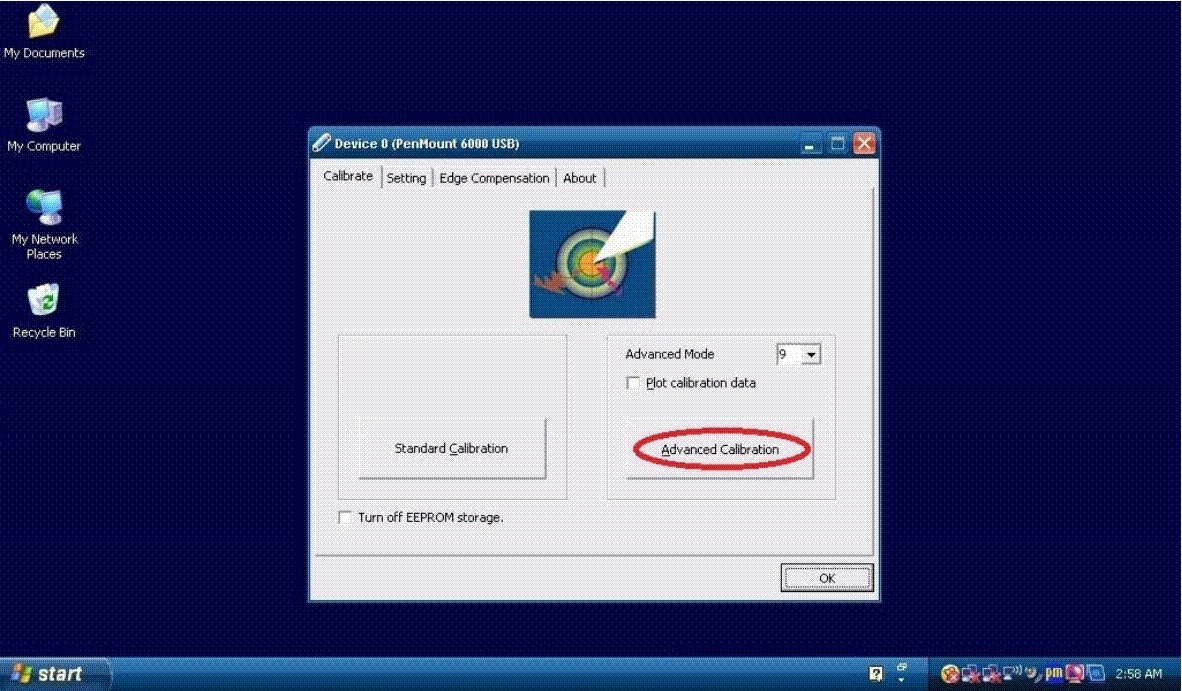
- Establishing to be completed through Pressing and Separation
repeatedly at the Marking Point of Screen as instructed